Get upto 60% Discount

Get upto 60% Discount
Unlimited Access:
$15.00 Original price was: $15.00.$4.99Current price is: $4.99.
Available Download Files

Tired of Restrictions?
Go Unlimited!
Join Our Membership to Download 8400+ Plugins & Themes

Waste disposal and recycling sites tend to have the same pressure points: service areas change, pricing is request based, and customers want fast answers about pickup rules. A generic business theme can look fine, but the structure often fights you when you try to publish service-specific pages, show coverage by neighborhood, or route leads to the right team.
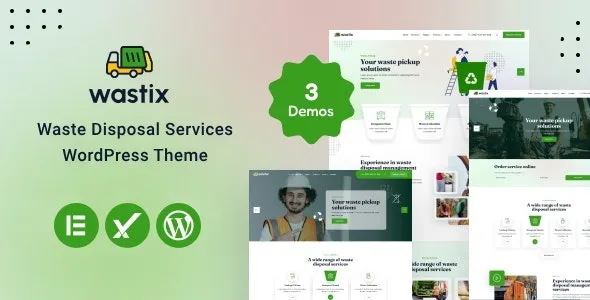
Wastix – Waste Disposal Services WordPress Theme is built around that reality. It gives you purpose-made page layouts and content blocks that map to how waste companies actually sell: services, schedules, bins, compliance notes, and quote requests. If you are evaluating a Wastix – Waste Disposal Services WordPress Theme download, treat it as a site framework that reduces setup decisions rather than a one-click “make my site rank” shortcut.
The core value is speed to a credible, navigable service website. Wastix is designed to help you publish landing pages that match search intent like “dumpster rental,” “commercial waste pickup,” “recycling collection,” or “bulk item removal,” without inventing the layout from scratch.
In practice, that means you can structure your site around:
Service pages that answer “what’s included,” “what’s not allowed,” and “how scheduling works” in a predictable, scannable pattern.
Location pages that clarify coverage and response time, which is often what users need before they submit a form.
Quote and contact pathways that are visible across the site, not buried behind a single contact page.
Most waste disposal businesses need a site that does three things well: explain services clearly, capture leads reliably, and support ongoing updates without breaking layouts.
Wastix tends to fit best when you want to launch with a solid baseline and then iterate. You can start with a homepage, a handful of service pages, and a quote form, then expand into service area pages and seasonal content later. This approach also helps crawl prioritization because you are publishing fewer, stronger pages first instead of generating dozens of thin pages that compete with each other.
If you use Wastix templates to spin up many pages quickly, the main risk is repeating the same copy across “services” and “locations.” Google often treats that as duplicate intent, even if the city name changes.
To keep pages index-worthy:
Give each service page a unique “rules and constraints” section. For example, acceptable materials, permit requirements, or container sizes.
On each location page, add specifics that are true for that area. Typical pickup windows, local landfill notes, apartment policies, or HOA restrictions.
Use internal links intentionally. Service pages should link to 2–4 relevant locations, and location pages should link back to the service with the best match. Avoid linking every location to every service in a giant grid.
To keep your site stable and avoid the most common setup errors, install Wastix carefully and validate the basics before importing large demo content.
Update WordPress core and all existing plugins. Confirm you have a working backup and that you can restore it. If you are moving from an older theme, note any custom shortcodes or page builder elements that might not carry over.
Download the theme package from your account area or delivery source. Make sure you have the installable theme ZIP (not a full bundle that contains documentation and multiple folders). If your download includes multiple ZIPs, the correct one is usually named after the theme.
In the WordPress dashboard, go to Appearance, then Themes, then Add New, then Upload Theme. Upload the ZIP, install, and activate.
After activation, you will typically be prompted to install required or recommended plugins. Install and activate them in one pass. Do not skip this, since the theme’s layouts often depend on these plugins for blocks, sliders, forms, or template widgets.
If you use demo import, do it on a fresh site or staging environment first. Demo content is useful for layout reference, but it can also add many pages you do not need. Import, then immediately delete irrelevant pages and menus so you do not publish thin content accidentally.
Set permalinks to a clean structure (post name is common). Build a primary menu that mirrors user intent: Services, Service Areas, Pricing or Request a Quote, Contact. Then set your homepage and blog page in Reading settings.
Check mobile spacing, tap targets, and form usability. Confirm that your key pages are reachable within two clicks from the homepage. Once ready, submit your sitemap in Search Console and request indexing for your top pages first, rather than every page at once.
With a multipurpose theme, you often spend hours assembling the same building blocks: service cards, icon lists, “how it works,” testimonial sections, and quote banners. The friction is not the design itself. It is consistency. Each new page becomes another chance to drift into slightly different spacing, headings, or CTA placement.
Wastix leans toward consistent section patterns, which helps both usability and SEO. When users can scan pages quickly, they spend less time hunting for the basics like accepted materials or scheduling rules. That clarity improves lead quality and reduces back-and-forth emails.
If your goal is to get a clean waste services site online quickly, a Wastix – Waste Disposal Services WordPress Theme download is often more efficient than assembling a design system from scratch.
Demo imports can create dozens of pages that look finished but are not relevant. Leaving them live can dilute crawl budget and confuse internal linking. Keep only what you will maintain.
Waste services have different conversion actions. Dumpster rental might need a size selector. Commercial pickup might need a call request. Bulk item removal might need photo upload instructions. Tailor the CTA to the service intent, even if the theme gives you a universal button style.
This is the fastest way to create duplicate intent. Add real operational detail per area, even if it is just a short “What’s different here” section.
Service businesses often rely on before-and-after images, fleet photos, and icons. The theme can look heavy if you upload uncompressed images or stack multiple sliders on one page.
Keep hero images optimized, avoid autoplay video backgrounds unless you truly need them, and limit the number of animated sections above the fold. You will usually get a better real-world result by keeping the homepage fast and moving detail to service pages.
If your site is essentially a single landing page with a phone number and a form, a lightweight one-page layout can be enough. Similarly, if you already have a custom design system and a developer maintaining templates, switching themes may not be worth the migration cost.
Wastix is most useful when you want a complete service-site structure without rebuilding everything manually, especially if you plan to publish multiple service and coverage pages over time.
Yes, but you will want to separate intent. Create distinct pages for residential pickup, commercial contracts, and dumpster rental so each page can answer different questions about pricing, scheduling, and acceptable materials.
Usually, yes. The key is how you label navigation and sections. Replace “waste disposal” language with recycling collection, sorting guidance, and acceptable items. Also add clear contamination rules, since that is often what drives support calls.
Start with one strong “Service Areas” hub page, then add location pages only where you have real coverage and operational detail. Link each location to the most relevant service pages instead of linking everything to everything.
Not by itself, but leaving demo pages indexed can. After import, delete unused pages, remove placeholder blog posts, and make sure your sitemap only includes pages you intend to maintain.
Use a form plugin with basic protections like honeypots and rate limiting. Avoid publishing an email address in plain text. Also consider adding a required service selector to route leads and reduce low-intent submissions.
It can be, but plan your information architecture early. Use a consistent template for location pages, then add unique details per branch. For large rollouts, build on staging first and publish in batches so Google can crawl and prioritize your most important pages.
If you are ready to build, focus on getting the correct installable ZIP, activating required plugins, and publishing a small set of high-quality pages first. That is the fastest path to a site that converts and gets indexed cleanly.
For teams comparing options, the practical test is simple: after a Wastix – Waste Disposal Services WordPress Theme download, can you publish a service page that answers pricing approach, accepted materials, scheduling, and a clear next step in under an hour? If yes, it is doing its job.
Once installed, treat your Wastix – Waste Disposal Services WordPress Theme download as the starting point for a content system. The more you align each page to a single intent, the easier it becomes to grow without creating duplicates.
And if you are collecting assets before launch, keep a checklist: optimized images, a short list of services, real service area details, and one primary conversion path per page. That preparation makes the Wastix – Waste Disposal Services WordPress Theme download feel like a build accelerator, not another theme to wrestle with.
For Installation or Technical Related Queries check FAQ Page
Our Website also have older version of the plugins and theme. So you can test your website with compatible plugins or Rollback plugins in case of any bug or compatibility issues.
UNZIP the file downloaded from our website, the zip file might contain other files like Template, Docs etc. So make sure you upload correct file.
To Install Plugins:
To Install Themes:
Sometimes theme/plugin might ask you for license, just ignore. Because we have already activated the product with out legal key, which we have purchased for you.
When a New version appears and is available on our website you’ll find it in My Account “Downloads section”.
For Destination Already Exists error:
Make sure to Delete the version of theme/plugin that you have on your website before you upload our premium version, it might cause a conflict during installation and activation.
Or WordPress will say “destination already exists” when trying to upgrade using a zip file and will fail to upgrade the theme or plugin.
If you faced “destination already exists” error installing this Plugin will solve the issue – Easy Theme and Plugin Upgrades.
Our business hours are Monday to Saturday from 10:00 am to 8:00 pm, any request made outside these hours will be answered until next business day. Support and Updates can take 24 to 48 hours. Support provided is for product installation. Please be aware of possible time zone differences when waiting for our reply.
If you have any Queries, Feel Free to Contact Us:
Abuse Warning:
For more information please read FAQs & Terms of Use.
All directory items are created by third-party developers and distributed by ULTRA PLUGINS under the General Public License (GPL). ULTRA PLUGINS is not affiliated with, nor does it endorse, any product featured on this site.


